If you’ve ever stood in a muddy field at 6 a.m., watching your tractor and new attachment pull in fits and starts instead of gliding across the soil, you know calibration isn’t just a “nice-to-do” step—it’s the difference between a productive day and one spent fixing a misaligned implement. As a tractor attachments supplier who’s spent 12 years on call with customers from small family farms to large commercial operations, I’ve lost count of how many times a poorly calibrated attachment has turned a simple task like seeding or landscaping into a nightmare. Today, I’m walking you through the exact calibration process I teach every customer, no matter what attachment you’re using. No fancy tools, no confusing jargon—just steps that work. Tractor Attachments
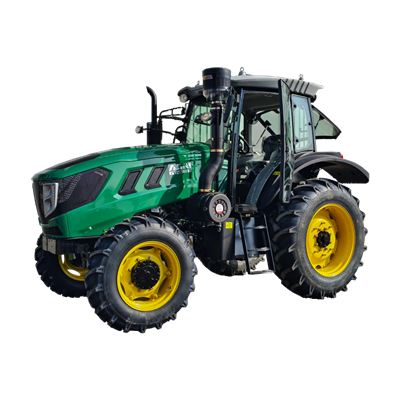
First, let’s get one thing straight: calibration isn’t the same as setup. Setup is bolting your attachment to the three-point hitch and connecting the hydraulic lines. Calibration is fine-tuning that connection to make sure every part works in sync with your tractor, even as terrain or load changes. Skip this, and you’ll deal with uneven cuts, premature wear on your parts, or even safety risks like attachments bouncing loose mid-task. I’ve seen customers save hundreds of dollars in replacement parts just by taking 30 minutes to calibrate instead of jumping straight to work.
Let’s start with the basics you’ll need before you begin. You don’t need a garage full of tools, but you do need a few key items: a tape measure (standard or metric, whatever you prefer), a level (a 2-foot torpedo level works great for tight spaces), a pair of adjustable wrenches, a felt-tip marker, and a notebook to jot down readings. If you’re calibrating hydraulic attachments like loaders or backhoes, you might also want a pressure gauge (most new attachments come with a port for this) and a friend to help hold the level or watch your lines while you adjust. Pro tip from my team: do this on flat, solid ground if you can. A gravel pad works better than a sloped driveway, because even a slight tilt will throw off your measurements.
First step: Calibrate the three-point hitch, the part that connects your attachment to the tractor. This is the foundation of every calibration, so don’t skip it. Most tractors have a top link that’s adjustable, plus two lower arms that connect to the attachment. Start by parking your tractor, turning off the engine, and setting the parking brake—safety first, always. Next, extend the three-point hitch all the way down (lower it until it can’t go any further). Grab your level and place it on the top mounting bar of the attachment, the part that connects to the center of the three-point hitch. Now, check if the bar is level left to right. If it tilts to one side, that’s where the top link adjustment comes in. Locate the top link’s turnbuckle (the threaded metal rod with two adjustable ends) and turn it clockwise or counterclockwise to raise or lower that side. Do this in small increments—half a turn at a time—then check the level again. I always tell customers to make small adjustments here; twisting the turnbuckle a full turn will throw your alignment way off. Once the attachment’s top bar is level left to right, move to the front-to-back check. For this, look at the lower arms of the three-point hitch. Most have a pin or a clamp that lets you adjust the lower arm length. Adjust each arm equally to make sure the attachment sits straight front to back, not leaning forward or backward. A common mistake here is adjusting only one arm—this will make the attachment pull to one side when you use it, no matter how straight the top link is.
Next, if you’re calibrating a hydraulic attachment—something with moving parts like a loader bucket, a backhoe arm, or a grading blade—you’ll need to sync the hydraulic controls to the tractor. This is where a lot of new customers run into trouble. Let’s use a front-end loader as an example, since it’s one of the most commonly calibrated attachments. Start with the bucket on the loader: lower it all the way to the ground, then tilt it back so the edge is parallel to the level of the ground. Now, look at the joystick or control lever in the tractor cab. Most modern tractors have a setting that lets you calibrate the range of motion for the hydraulic controls, so you don’t have to jerk the lever all the way forward to get the bucket to tilt. For older tractors without that setting, you’ll need to adjust the hydraulic flow control valve. Locate the valve on the tractor’s hydraulic manifold (it’s usually near the back, where the hoses connect to the attachment). Adjust the flow settings for the lift and tilt functions, testing the bucket movement as you go: when you move the lever halfway, the bucket should lift halfway, not stall or move too fast. If you’re calibrating a more complex attachment like a rotary cutter or a snow blower, check the angle of the blade: it should be 0 degrees for straight cuts or throwing snow forward, or adjusted to 15 degrees for side discharge, depending on your job. Most attachments come with a degree guide printed on the side, but if yours doesn’t, use your tape measure to check the distance from the blade edge to the ground on both ends—they should be equal.
Now, the most important step: test the calibration in a low-stakes environment before you head to your main field. This is where I see customers cut corners, and it’s where mistakes happen. If you’re calibrating a seeder, for example, drive over a small patch of grass (not your cash crop) and check if the seeds are being dropped evenly, at the right depth. If they’re too deep, you’ll need to adjust the attachment’s depth wheels—raise them slightly so the seeder sits higher; if they’re too shallow, lower them. For a grading blade, make a few passes over your test pad and check the dirt level with your tape measure: the grade should be consistent across the entire path, not higher on one side or lower in the middle. I always tell customers to make one small adjustment, test, make another small adjustment, test again. Don’t re-calibrate the whole thing over and over—most issues are just a tiny tweak of half an inch or a quarter turn.
Wait, what about older attachments that don’t have adjustable links or settings? I get that question all the time, especially from customers who’ve had their attachments for 10+ years. A lot of older tractor attachments were built to be compatible with standard hitch sizes, so their calibration is a little simpler, but not impossible. For these, start by checking the wear on the hitch pins. If the pins are worn down more than an eighth of an inch, that’s probably the root of your alignment issues, not the calibration itself. Replace the pins first, then go through the same level checks as you would for a new attachment. I also tell customers with older attachments to inspect the hydraulic hoses regularly—cracked or kinked hoses can make the attachment move unevenly, which feels like a calibration issue when it’s just a worn hose.
Now, let’s talk about common mistakes I see customers make that ruin all their hard work. First, calibrating when the attachment is wet. Mud and grass clippings add extra weight and change the balance of the attachment, so always calibrate on a clean, empty attachment. Second, forgetting to re-calibrate after changing parts. If you replace a hitch pin, a hydraulic hose, or even the blade on your rotary cutter, you’ll need to re-check your alignment—even a small part change can throw off the calibration. Third, over-tightening the turnbuckle on the top link. I’ve seen customers twist it so tight that the three-point hitch bends, which causes expensive damage to both the tractor and the attachment. Tighten it just enough to hold the level, no more. And finally, don’t skip the test pass. Even if your level reads perfect on gravel, the soil in your field might be softer or sloped, so you need to make sure the calibration works in your actual work environment.
As a tractor attachments supplier, my number one goal is to make sure my customers’ attachments work as well as they’re supposed to, and calibration is the easiest way to make that happen. I’ve had customers reach out to me after following these steps, saying they cut their seeding time by 20% or didn’t have to replace a single blade on their rotary cutter all season. That’s the difference between a calibrated attachment and one that’s just bolted on.

If you’re still unsure about calibrating your specific attachment—whether it’s a loader, a mower, a grader, or something else—my team and I are here to help. We supply high-quality, durable attachments built to fit all major tractor models, and we have a team of experts who can walk you through every step of calibration, answer any questions you have, and even help you troubleshoot if something doesn’t feel right. Don’t let a poorly calibrated attachment slow you down or cost you money—reach out to us to learn more about our attachments and calibration support, so you can get back to working efficiently in your field.
Tractor Attachments References:
- Tractor Supply Company. (2022). "Calibrating Three-Point Hitch Attachments for Small Tractors." Farming Maintenance Guide.
- National Agricultural Statistics Service. (2021). "Impact of Implement Alignment on Crop Yield and Equipment Longevity." USDA Technical Bulletin.
- Kubota Tractor Corporation. (2020). Hydraulic Attachment Calibration for Modern Tractor Models. Operator Training Manual.
- American Society of Agricultural and Biological Engineers. (2019). Standard Practices for Calibrating Soil Preparation and Seeding Equipment. ASABE S342.
Shandong Ling Ke Industry Group Co., Ltd.
As one of the most professional tractor attachments manufacturers and suppliers in China, we’re featured by quality products and good price. Please rest assured to buy cheap tractor attachments for sale here from our factory. We also accept customized orders.
Address: 50 Meters West of the Connecting Road Between Jiuma Road and Shima Road, Fangzi District, Weifang City, Shandong Province, P.R.China
E-mail: aileenlin@sdlingkegroup.com
WebSite: https://www.lingketractor.com/
